AI Support Widget Documentation
Integrate AI-powered customer support into your React or Next.js app in minutes. This guide covers installation, integration, and API usage.
Quick Start
Get your AI-powered customer support up and running in minutes!
The chat widget appears as a floating button in the bottom-right corner of your website.
Upload documents, FAQs, and policies to train your AI assistant.
🚀 Get Started in 5 Minutes
- 1. Sign up and get your API key
- 2. Install dependencies (framer-motion, lucide-react)
- 3. Add the widget to your React/Next.js app
- 4. Upload documents to your knowledge base
- 5. Test and customize your setup
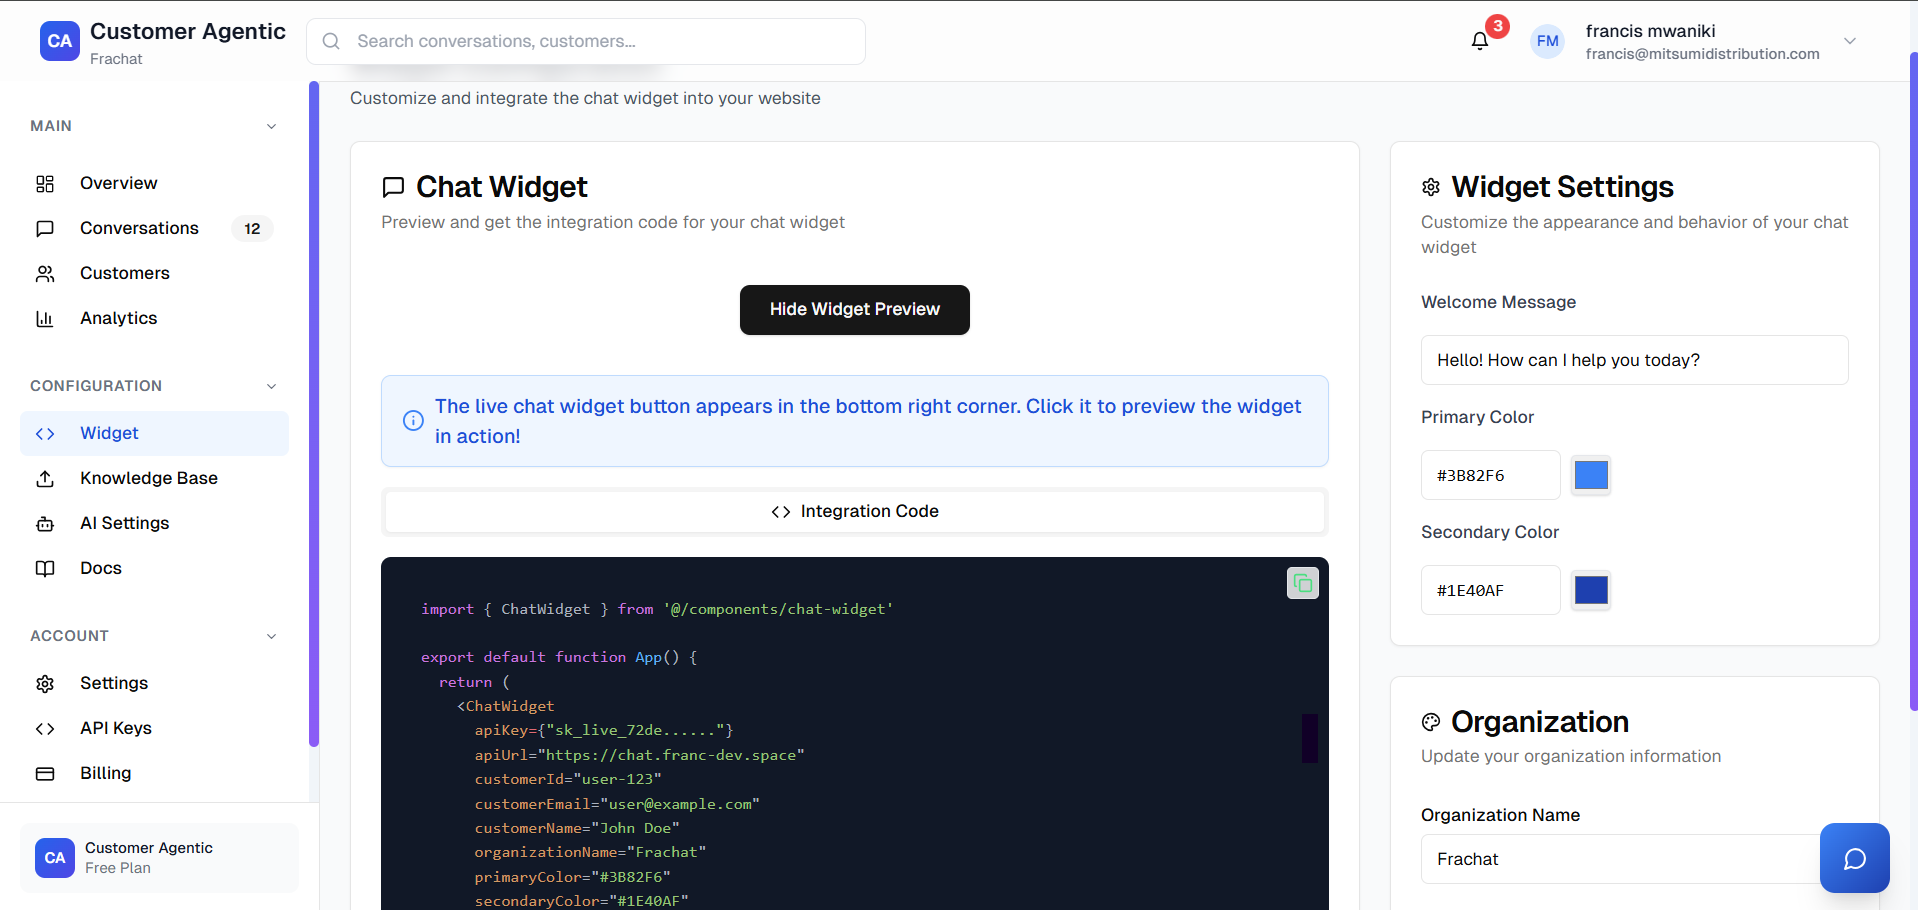
Chat Widget
The chat widget provides instant AI-powered customer support on your website.
Key Features
- • Floating Design - Appears in bottom-right corner
- • Custom Branding - Match your company colors
- • Smart Responses - AI-powered based on your knowledge base
- • Mobile Responsive - Works on all devices
- • Easy Integration - Simple React component
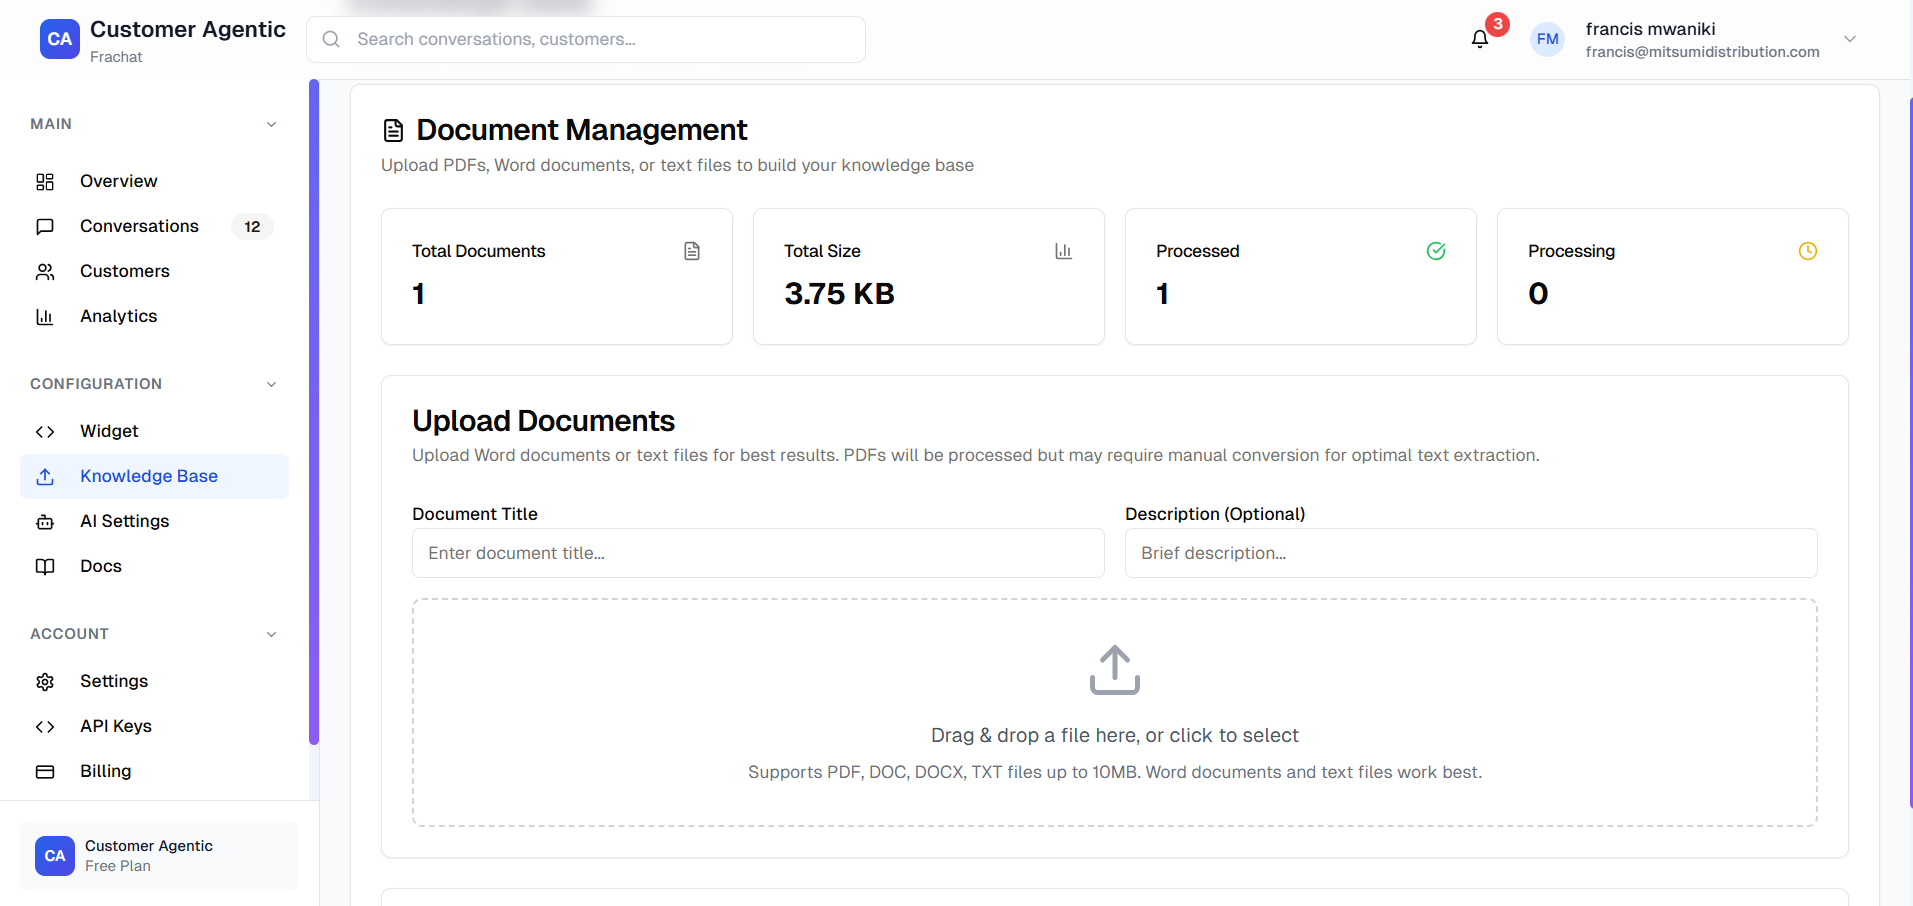
Knowledge Base
Upload your company's documents to train the AI assistant with your specific information.
What You Can Upload
📋 Product Information
- • Product manuals and guides
- • Feature descriptions
- • Technical specifications
🔧 Support Documentation
- • FAQ documents
- • Troubleshooting guides
- • Step-by-step tutorials
📄 Company Policies
- • Return and refund policies
- • Shipping information
- • Terms of service
🎯 Industry Content
- • Industry terminology
- • Best practices
- • Compliance information
Installation
Install the required packages using your preferred package manager:
npm install framer-motion react-markdown lucide-react react-syntax-highlighterPeer dependencies: framer-motion, lucide-react, react-syntax-highlighter
TypeScript Setup
If you use TypeScript, add the following declaration file to your project (e.g., react-syntax-highlighter.d.ts) to avoid type errors:
declare module 'react-syntax-highlighter' {
    import * as React from 'react';
    export interface SyntaxHighlighterProps {
      language?: string;
      style?: Record<string, unknown>;
      PreTag?: string | React.ElementType;
      customStyle?: React.CSSProperties;
      codeTagProps?: Record<string, unknown>;
      wrapLines?: boolean;
      lineProps?: Record<string, unknown>;
      useInlineStyles?: boolean;
      children: string;
    }
    export const Prism: {
      (props: SyntaxHighlighterProps): JSX.Element;
    };
    const SyntaxHighlighter: React.FC<SyntaxHighlighterProps>;
    export default SyntaxHighlighter;
  }

  declare module 'react-syntax-highlighter/dist/esm/styles/prism';
Copy Full Chat Widget Source
Preview below. Click the button to copy the entire ChatWidget component source code for use in your own project. create components/chat-widget.tsx and paste the code below.
React Integration
Add the chat widget to your React app. Paste the following code in your main component:
import { ChatWidget } from '@/components/chat-widget'

export default function App() {
  return (
    <div>
      {/* Your app content */}
      <ChatWidget
        apiKey="sk_live_your_api_key_here"
        apiUrl="https://chat.franc-dev.space"
        customerId="user-123"
        customerEmail="user@example.com"
        customerName="John Doe"
        organizationName="Your Company"
        primaryColor="#6366F1"
      />
    </div>
  )
}
Next.js App Router
For Next.js App Router, use the same integration as React. Paste the following code in your app/layout.tsx or main component:
import { ChatWidget } from '@/components/chat-widget'

export default function App() {
  return (
    <div>
      {/* Your app content */}
      <ChatWidget
        apiKey="sk_live_your_api_key_here"
        apiUrl="https://chat.franc-dev.space"
        customerId="user-123"
        customerEmail="user@example.com"
        customerName="John Doe"
        organizationName="Your Company"
        primaryColor="#6366F1"
      />
    </div>
  )
}
Usage Example
Start a conversation via API:
// Initialize conversation
const response = await fetch('/api/chat/init', {
  method: 'POST',
  headers: {
    'Authorization': 'Bearer sk_live_your_api_key_here',
    'Content-Type': 'application/json'
  },
  body: JSON.stringify({
    customerId: 'user-123',
    customerEmail: 'user@example.com',
    customerName: 'John Doe'
  })
})
const { conversationId } = await response.json()
API Reference
| Method | Endpoint | Description |
|---|---|---|
| POST | /api/chat/init | Initialize a new conversation |
| POST | /api/chat/message | Send a message |